How To

How to Camp in Winter - Part 2 0
Camping in winter might sound a bit crazy, but Kilimanjaro Gear expert Connor has the how-to tips you need for a safe, comfortable and fun winter camping adventure.
How to Camp in Winter - Part 2
You’re still reading after Part 1? Looks like you actually are interested in winter camping! Congratulations in making it this far, you are in for a treat.
In Part 1, we covered the apparel required to keep you dry, comfortable, warm and happy. In this article we will discuss the necessary gear for snow travel, camping, and sleeping.
As I mentioned in Part 1, good equipment can cost a pretty penny. Don’t take shortcuts here as cheaper equipment will either fail or not perform adequately when you need it most. That said, we do our best to provide the best gear information for all price ranges.
Tent
The first thing most people think of when camping in the snow is, “Where do you sleep?” The answer is: usually in a solid 4-season tent.
People often ask me: “I own a 3-season tent. Can I use it for snow camping?” My usual answer is “It depends”, but I really mean “Probably not”.
The primary differences between a 3 and 4 season tent are cost, strength, durability and the rain fly. A 3-season tent has a mesh ceiling for ventilation along with an optional rain fly that extends about 3/4th of the way down the tent, allowing for air flow.
This is nice during summer and spring months but in heavy snow with wind, your tent will fill with snow by morning! Talk about a wake-up call!
A 4-season tent has the durability to withstand heavy snow weight and high winds. They also include a vestibule area in the front of a tent you can use for cooking without leaving the tent. If you’re serious about snow camping, this is a must purchase.
I personally have used the Mountain Hardwear Evo 3-person tent for a few years now and love it. For a list of the best 4 seasons tents out there currently click here. If you are just starting out, I advise buying a cheaper or used 4-season tent as you can save hundreds of dollars.
(Pro Tip: If you know that there will be no wind and snow, you can get away with a three season by digging your tent into the snow about 1-2 feet).
Sleeping Pad
Sleeping pads insulate you from the cold ground under your tent. During the summer months, it’s easy to get away without a pad as the ground is usually warm enough to sleep on.
When sleeping on snow, you’ll be cold without a pad or some form of insulation beneath you - even if you have the warmest sleeping bag on the market.
The most important consideration when buying a pad is the R-Value. The higher the R-value, the more insulated the pad is (and the warmer you’ll be). For snow, a pad with an R-Value over 4 is recommended for maximum warmth.
I use the Big Agnes Q-Core SLX which has an R-Value of 3 and it fares nicely for most of my trips. Click here for list of the best winter sleeping pads
Sleeping Bag
It goes without saying that camping in snow means cold nights! In California, the coldest snow camp night I've experienced was 10 degrees Fahrenheit. I used my Kelty Ignite 15 degree down sleeping bag. It was a bit of a chilly night, but thanks to a quality sleeping pad and warm tent, I slept comfortably.
When choosing the warmth of your bag, determine what temperatures you will be sleeping in and how packable you need your bag. If you are backpacking and need a lighter weight bag, you'll spend more to get the warmth you need. Down bags are the best choice, but you can also find very warm synthetic bags for a decent price.
I found a great bag that offers a nice compromise on weight, packability, warmth and price. The Mountain Hardwear Lamina Z-Bonfire -30 bag is a great synthetic bag that is priced at only $225 and weighs 6 pounds, 9 ounces.
Synthetic sleeping bags are great during winter months as they are much more durable and do not lose their warmth when wet. Waterproof down compacts better, is lighter weight, but is much pricier. For a list of the best winter sleeping bags, click here.
(Pro Tip: before going to sleep at night, heat up water and pour it into a water bottle and place it in your sleeping bag. The warm water will last several hours and keep you extra toasty).
Snowshoes
If you plan on camping anywhere with deep snow, you'll need snowshoes to walk or hike any meaningful distance. Snowshoes make walking through snow much easier by distributing your weight over a larger surface area, preventing you from sinking in the snow.
For walking and hiking moderate distances, basic snowshoes are adequate. I've used the Redfeather Trek Snowshoe for the past three seasons and they still work perfectly. For a list of the best snowshoes, click here.
Cold Weather Camp Fuel
If you already have a summer camp stove, you should be good for snow camping, as long as you use fuel rated for cold weather conditions.
I always purchase Snowpeak GigaPower camp fuel as it works down to 15 degrees and has never let me down. Remember to also bring more fuel than you would during non-winter months as you may have to melt snow for water and food will take longer to heat up at higher elevations.
Snow Shovel
Finally, you're going to want a snow shovel. It's ideal for building and shaping your cooking, sleeping, and restroom areas in the snow. It works much faster and keeps your hands warmer than digging with your gloves. Any snow shovel will work, however, I use the Brooks Range Compact Sharktooth Snow Shovel. This shovel is great as it breaks down into two small pieces and is very lightweight.
Snow More to Say
There you have it you crazy snow campers. Follow these tips and you’ll find yourself enjoying camping season, every season. If you want any more information feel free to email us as we would be happy to help!
- Andy Somerville

How To Camp in Winter - Part 1 0
Camping in winter might sound a bit crazy, but Kilimanjaro Gear expert Connor has the how-to tips you need for a safe, comfortable and fun winter camping adventure.
Here's Connor...
"Wait, did I read that right? Camp? In the snow?!? But it’s cold, wet, and miserable right?"
Actually, camping in the snow can be an incredible experience if you have the right equipment and know a few tricks. There's nothing quite like waking up to a fresh blanket of snow on the trees, hilltops and peaks.
Having the right clothing for the conditions is the key to an enjoyable winter camping experience.
My clothing recommendations are based on snow camping. If you're prepared for camping in snow, you'll have everything you need camping in dry winter conditions too.
One last note before we dive in. Be prepared for some sticker shock. Functional, reliable and breathable cold weather apparel can cost a pretty penny.
It's best not to take shortcuts here, as cheaper equipment will either fail or not perform adequately, just when you need it most. The potential result of cold weather gear failure is discomfort, misery, or worse: frostbite or hypothermia. None of these outcomes make for an enjoyable camping experience!
Let start with the feet and work our way up.
Socks
Warm socks are a must, yet are often overlooked when winter camping. Look for any thick Merino Wool sock or quality ski sock long enough to cover part or all of your calf. Choose socks that are at least 70% Merino wool.
Bring two (or more) pairs so when one is drying out after a long day, you can wear the other.
Bonus tip – when you crawl into your sleeping bag, take your socks off and leave them in the foot box of your sleeping bag. This will prevent your feet from sweating and you'll wake up to warm, dry socks in the morning. Warm feet + hot coffee = winning
Boots
Boots provide insulation, support, and traction while in the snow. Having a good boot can make the difference between an enjoyable trip and a miserable one. Note that some boots are rated as waterproof while others are water-resistant. Waterproof boots tend to be heavier and clunkier than lighter weight water-resistant footwear, but they're the best choice for truly wet conditions or multi-day outings.
I personally use the Garmont Momentum Boot. These boots kept me warm for three days in knee deep snow while being on the lower end of the price spectrum. Make sure you try on boots using the socks you plan on wearing. Proper fit is essential for maximum comfort and insulation.
Base Layer
The purpose of a base layer is to add warmth while wicking moisture away from your skin. Any middle to heavyweight Merino Wool base layer will suffice. I personally use the Icebreaker middle weight leggings and top. As an added plus, wool doesn't retain body odor nearly as much as synthetic fabrics do. That means fewer pieces to pack for a multi-day trip.
Bonus tip: if wool makes your skin itchy, wear a moisture-wicking t-shirt underneath the wool base layer.
Mid Layer
A mid layer provides insulation between your base layer and your shell. You can remove it during higher levels of activity to reduce sweating, then put it back on while resting or in camp to provide added warmth.
Mid layers are made of down, fleece, wool, or synthetic materials that act similar to down.
I personally use the Eddie Bauer Hooded MicroTherm down jacket for my mid layer in milder temperatures and my Mountain Hardwear Nilas Down in colder climates in higher elevations.
Outer Layer or Shell
An outer shell insulates you from moisture and wind. This is the most important piece of your upper body layering, so don't scrimp here. I personally use the Black Diamond Liquid Point Shell. I love it and highly recommend it or a similar shell made with Gore-Tex, a breathable yet waterproof fabric technology.
Waterproof Pants
The purpose of waterproof pants is the same as a shell - to keep moisture and the elements away from your base layers and skin. Some brands offer an added layer of insulation in addition to the wind and waterproof outside surface. It's up to you to determine if you need added insulation to supplement your base layer garments. Consider the expected conditions as well as your planned activities.
I personally use the Mountain Hardwear Insulated Highball pant over my icebreaker mid weight base layer.
Gloves
There's something particularly awful about cold wet hands. If you haven't experienced it, take my word for it and buy the best gloves you can afford.
It took me awhile to find the perfect gloves for cold, wet camping. I've been caught in the mountains with terrible gloves that didn't provide enough warmth or water resistance.
Never again!! I highly recommend the Outdoor Research (for quality and warranty) Highcamp Gloves. These gloves have a separate liner you can use alone when you need more sensitivity in your fingers but don’t want to expose your bare skin to the cold. The shell is fully waterproof and warm while still providing finger dexterity.
Glasses
In the snow, especially during sunny days, you will need some form of eye protection to prevent squinting, headaches, and even ‘snow blindness.
Any UV filtering glasses or goggles will work, but I personally use the Julbo Vermont Classic. They look bad-ass, fit snugly around the ear for windy conditions, and block out peripheral light that would leak in from the sides of regular sunglasses.
Balaclava
For exceptionally cold or windy days, I recommend you pack a Merino wool balaclava. It will protect your face from blowing snow while also warming your breath as you inhale.
Any Merino wool balaclava will work in this situation, however, the pricier ones tend to fit a little better while providing better breathability. Click here for a 2017 Top-List of balaclavas.
Beanie
To top everything off, you’re going to want a beanie in the snow. A beanie is nice for obvious reasons, it keeps your head and ears warm. Any warm beanie made out of fleece or wool will suffice.
I recommend anything that is large enough to covers your ears as well as the top of your head.
Well, there you go. Follow these steps and you will be warm and toasty head to toe in the backcountry during your next winter camping trip.
In Part 2 I'll cover required camping equipment along with some more tips and tricks to ensure your outdoor experience in the snow is an enjoyable one!
Happy Trails!
Connor
- Andy Somerville

5 Great Gifts for Outdoor Enthusiasts 1
Need last minute gift ideas for the campers, backpackers or hikers on your list? Check out this list of 5 great gift ideas for outdoorsy types, courtesy of gear guru Connor.
Ah the holidays – full of bonding moments with family, warm cups of hot cocoa, and the surprise heart attack when you realize you pushed off your gift shopping until the last minute.
You may be thinking: “What do I get my boyfriend? He likes to camp and hike but I’m not sure what gear he wants or needs.”
Or: “My spouse loves to rock climb and I’m pretty sure she has everything she’ll ever need.”
This is a common problem as some of us don’t necessarily know what our outdoorsmen and women really need.
These five items made my list because they're not necessarily top of mind yet useful for many outdoor activities from camping to hiking to climbing to hunting.
1. A Bombproof Multi-Tool
Lots of outdoor enthusiasts consider a multi-tool overkill. Most multitools include a tool or two they might never need.
That's a small price to pay when all the other tools are useful if not essential at one time or another. As the saying goes: “You never need a multi-tool until you need one.”
Consider it an insurance policy against the unexpected.
I have personally tested the Kilimanjaro Ballast multi-tool as well as the Ascend multi-tool. Both are solid choices, and I recommend the Ascend for any weight-conscious backpacker or climber as it weighs in at only 2.1 ounces. If weight is less of a concern (say, for a car camper or day hiker), the Ballast makes a great gift.
2. First Aid Kit
Sooner or later, anyone who spends enough time outdoors is going to need a first aid kit. A surprising number of outdoor enthusiasts head out with either a minimal first aid kit or none at all. Yet even minor injuries can slow or stop an outdoor adventure.
Traumatic injuries are relatively rare - more hikers are hobbled by twisted ankles or blisters than every other hiking injury combined. These minor annoyances at home can become a big deal ten miles into the wild.
For those worried mothers and spouses, what better gift to give than that of protection and keeping your loved ones safer in the outdoors? I recommend two different types of first aid kits, depending on your gift recipient's preferred outdoor activity.
For backpackers and those who are watching weight, I highly recommend the Ultralight, Watertight Medical kit. This kit weighs in at only 8 ounces, is waterproof, and has quite a few useful items for quick trips.
For heavy duty kits where weight is not an issue I recommend the Fully Stocked Master Camping First Aid Trauma Kit Bag. This bag is a little pricey but has large quantities of bandages and wraps, making it ideal for group trips.
3. A Good Cooler
Coolers are great! They keep your food and beloved beverages cool and fresh when conditions are hot and stale.
With so many coolers flooding the market lately, it’s hard to know the difference between them. And many of the newer cooler models are crazy expensive.
Are they worth it?
Maybe. What matters most is performance, regardless of price. A good cooler has sufficient storage space, durable construction and keeps ice solid for as long as possible.
One of the top performers for keeping ice is Cabela’s Polar Cap cooler. Not only does it keep ice longer than competitors such as YETI, Orca or Pelican, (it keeps ice for a whopping 8 days!!) it is also one of the least expensive of the premium cooler brands, making it a hands down winner.
4. Camp Lights
Camping lights make great gifts for anyone who spends nights outdoors. Most enthusiasts already bring flashlights, headlamps, and lanterns (gas and battery powered). Even so, it always seems another light would be nice here, or there, for cooking, for eating, for the tent, etc.
As an added plus, camping lights can be used for the car, garage, as a reading light, patio lights and more, making them a truly versatile gift for the outdoor enthusiast in your life.
We’ve used quite a few camping lights over the past decade and we recommend the Mpowerd Luci Outdoor 2.0 and the Kilimanjaro Lumavine. The Luci is great since it is solar powered and fully waterproof however it is not as bright as the Lumavine and is double the price.
The Lumavine is a USB rechargeable mini lantern that gives off a warm glow, is water resistant, and shines bright at 40 lumens on the high setting. And you can give two Lumavines for the price of one Luci.
5. Fire Starter
Most people bring a lighter with them when they venture outdoors. Although convenient, lighters can fail, get wet, or run out of fuel.
A reliable fire starter comes in handy in a situation like this (and you get badass points when you do make a fire).
Since most people don't think of owning a fire starter, it makes for a great gift. It can also teach a new skill whilst building a fire and assist if a sticky situation arises (worried mothers and girlfriends approved).
Fire starters are all over Amazon and there are many offering different perks such as built in compasses, whistles, and storage compartments.
The Darmon Spark-a-Fire is a great tool as it is inexpensive, long lasting, and waterproof while also boasting a whistle.
No matter what you decide to buy this holiday season, we know your loved one will be excited and adore you with all their heart forever and ever!
Cheers from Kilimanjaro Gear.
- Andy Somerville

Top 10 Backpacking Gear Picks 0
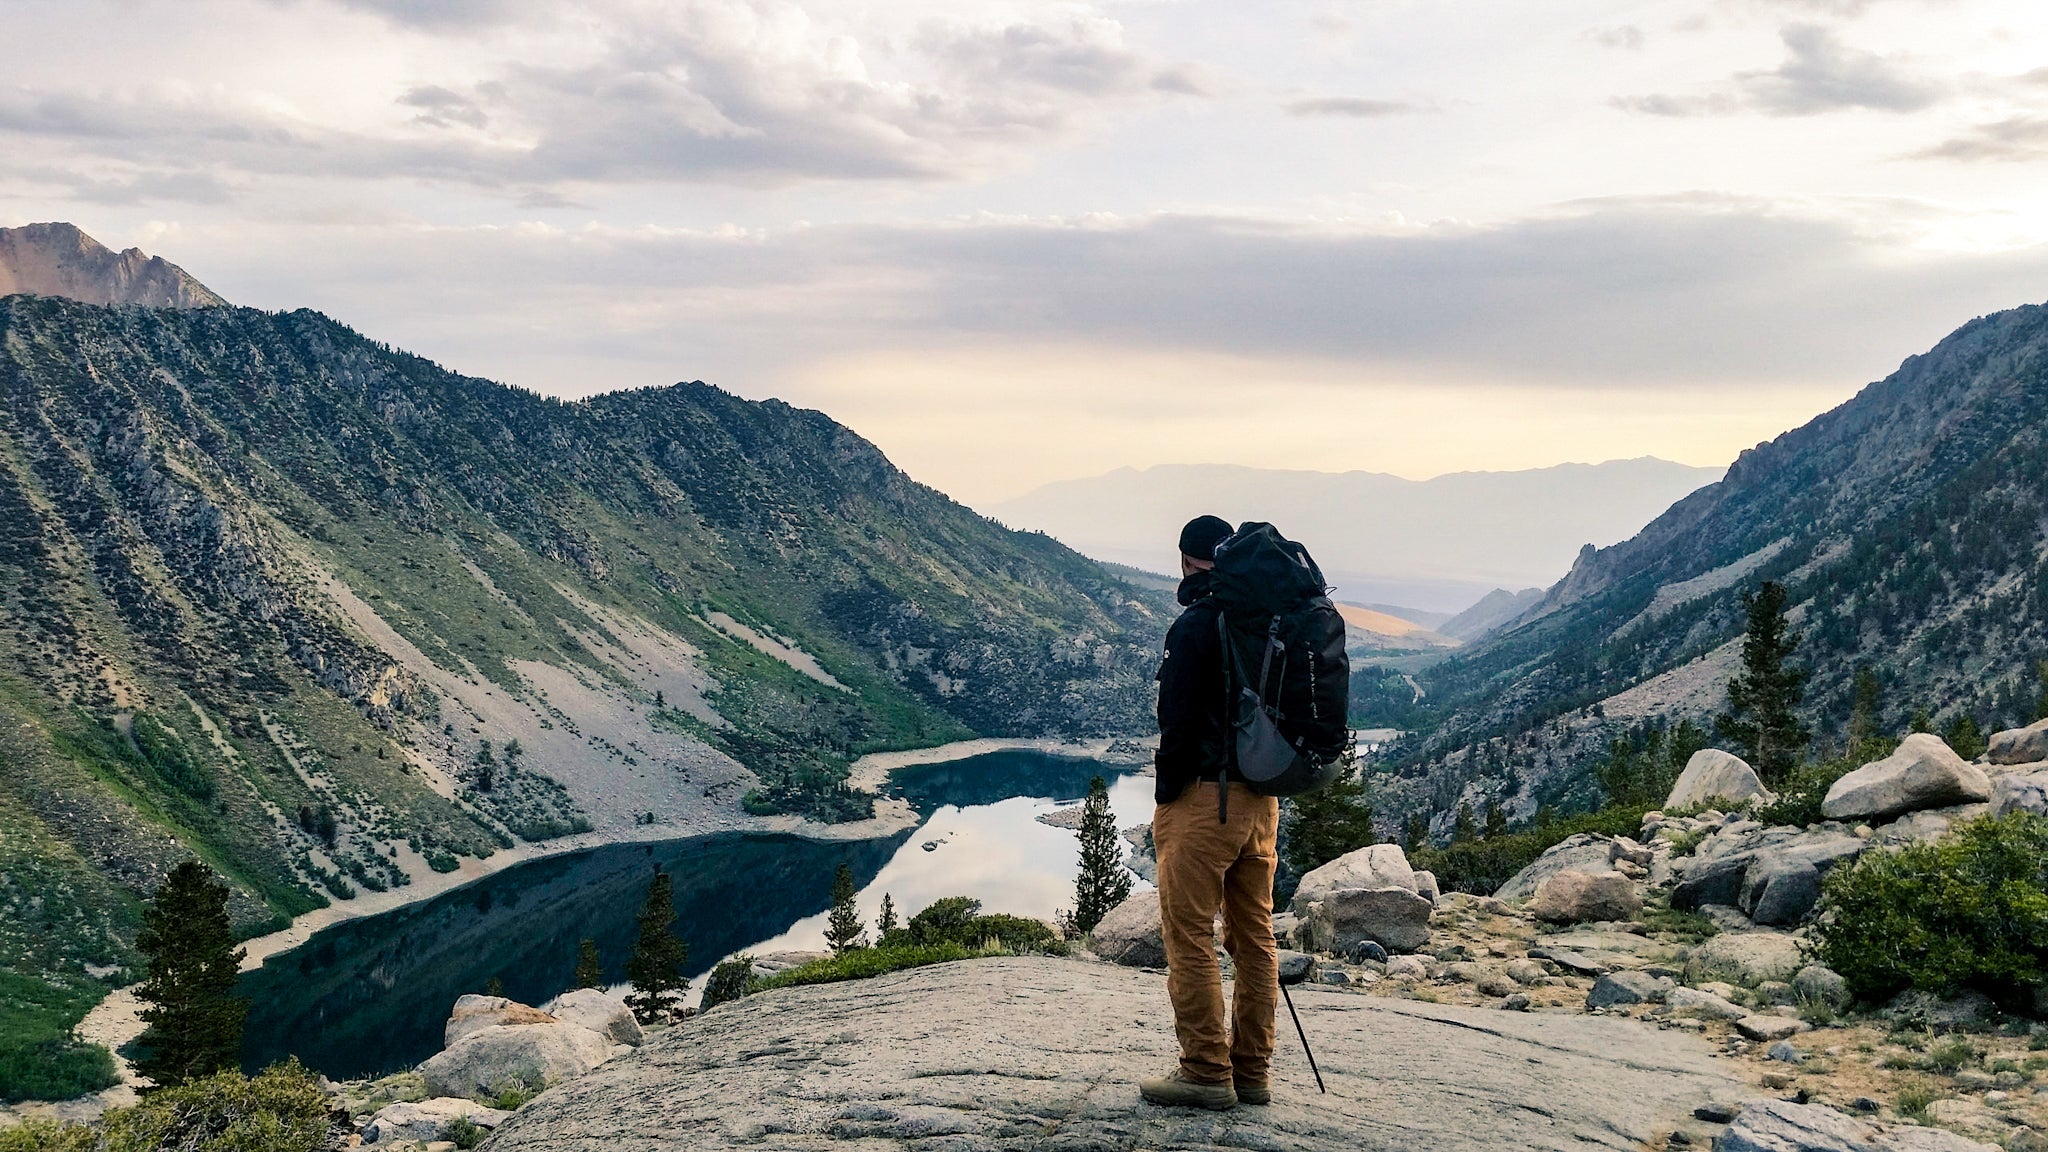
Kilimanjaro Gear brand ambassador Connor has assembled a list of Top 10 items every aspiring backpacker should consider.
Read on for this experienced outdoorsman's take on must-have gear for hitting the trail:
If you're like many beginning backpackers, the sheer amount, complexity and cost range of backpacking gear can be overwhelming. I've lost count of how many times friends, family members and acquaintances have asked me for advice.
They want to know what gear is really needed to get into backpacking without mortgaging a house or carrying the equivalent of a kitchen, bedroom and pantry on their back.
So what do you actually "need" to start backpacking? Ask any seasoned backpacker and you'll get a different answer from every one of them.
So here's my suggestion:
Focus on what you need to be comfortable.
As a beginning backpacker, you might not need to be comfortable to survive, but it sure helps improve the experience.
This isn't a forced march you're planning, it's about getting out there and having fun. And if you're smiling at the end of your trip, you'll be planning your next one on the drive home.
The trick then, is to walk (hike?) the fine line between comfortable...and overloaded. A heavy pack overstuffed with gear you don't need is overkill, and decidedly uncomfortable to carry.
Here is my list of a few key essentials that no comfort-oriented backpacker leaves home without (unless you're going ultralight - but that's a topic for another day).
1. Backpack
Duh....really? Yes - a backpack is nice if you'd rather not carry everything in your arms. There's a lot of design and functionality that goes into a backpack and they vary widely in terms of size, fit, features and cost.
Some of the most well-known brands are Osprey, Black Diamond, North Face, Arc'teryx, Gregory, and the REI house brand. For a comparison of some of the best packs, cost and where to buy, click here.
I personally have been using the Black Diamond Mercury for the last 3 years and love it.
The pack has lots of pockets and compartments but my favorite feature is the fact that you can lay the pack down and open it like a suitcase to access anything you need. Some higher-priced packs don't offer this feature, and it's one I can't live without.
Another important consideration is backpack size. A 65-75 liter pack is very large but great for multi-day hikes and trips ranging from 3 to 7 days.
You can get away with a 50 to 60 liter pack for shorter trips. I highly recommend heading to REI to get fitted since not all packs fit an individual correctly.
And for smaller day packs, I'd be remiss if I didn't mention our very own Kilimanjaro packs. I'm partial to the Operator Modular pack in the Tan or Camo color. At 40 liters, it's just right for a day hike or warm weather overnighter.
2. Sleeping Bag
You're going to need to sleep at some point and unless you want to run the risk of freezing or rolling around all night uncomfortably, a good bag is a necessity.
For general 3-season backpacking (spring, summer, fall) you are going to want a moderately insulated sleeping bag rated for 20F to 40F degrees.
The degree rating (or 'EN rating') is usually based on a warm male sleeper. Women tend to sleep cooler than guys, so a good rule of thumb is to add 10F degrees to your bag's lower temperature limit.
For example, a 20F degree bag would provide adequate warmth for a man in 20F degree weather. A woman sleeping in the same conditions would need a 10F bag to feel as warm as her male campmate.
Sleeping bag fill material is generally either "down" or "synthetic". Down is more expensive and requires greater care but usually is warmer, higher quality, and packs down smaller (for fitting into your pack).
Synthetic bags are filled with materials meant to mimic goose or duck down. These bags are usually cheaper and more durable, but less compact and heavier.
I personally own the Kelty Ignite 20 degree down bag (now called Kelty Cosmic). This bag is great, light, relatively inexpensive and waterproofed. It's held up well for three years of heavy use, and I love it for general backpacking and cooler nights.
For more information on the best 3-season sleeping bags, click here.
3. Tent
Some hardcore types will disagree but for me, and for comfort, a tent is a must. I personally like sleeping in a tent compared to a hammock or cowboy style on the dirt.
Hammocks are lighter and more compact than tents, but won't protect you from a random rain shower at 2 AM or pesky no-see-um bugs.
Just like backpacks and sleeping bags, tents vary widely. For general three-season backpacking, a 1 or 2-person tent will work fine. I recommend a 2-person tent since it provides adequate room for yourself and gear when backpacking solo.
If you are going with another person, you both can share the tent and split the weight and bulk between your backpacks. I personally use the simple, yet hardy REI Passage 2. This tent has served me well, through rain, wind and sunshine. It's lightweight and setup is fast and simple. It has room for 2 people with room to spare for gear.
For more tent comparisons click here.
4. Sleeping Pad
Sleeping pads go under your sleeping bag to provide comfort and insulation. There are many different types of pads from lightweight yet bulky foam pads to insulated blow-up pads to self-inflating pads.
I own all three types and they each have their pros and cons.
A foam pad like the Therm-a-Rest Z Lite is extremely lightweight and durable but lacks compact-ability and comfort.
The Big Agnes Q-Core is heavier but is nicely insulated and thick for cold nights and comfort - including snow. The Q-Core also compacts very nicely. The only downside with inflatable air pads is that they can puncture and leak. Be careful when placing your pad down at camp and make sure the area is free of small, sharp rocks and thorns. I had an air pad leak on me early into a 5 day trip and suffered some uncomfortable nights.
The Alps Mountaineering self-inflating pad is quite nice as well. It's thinner than the Q core but thicker and warmer than the Therm-a-rest. If you're a newbie and unsure which to choose, I recommend an inflatable.
More sleeping pads here.
5. Cooking Stove, Fuel, and Utensils
Unless you're willing to get by on jerky, energy bars and trail mix, you're going to want a portable, lightweight stove or cooking system (Hello, coffee!).
There are lots of variations on the theme, but the output is the same - hot (coffee) water and cooked food.
One of the most popular products is the Jetboil system. This advanced system has all the bells and whistles, from a neoprene cover for insulation to a meter that turns red when your water is hot.
The Jetboil is great for boiling water quickly - but in my opinion, that's about it. It is also larger, bulkier, heavier, and more expensive than a lot of systems.
I prefer simplicity, and if you do too, you'll be happy with the MSR PocketRocket. This system is bullet proof, cheap, simple, and very lightweight.
You'll also need fuel to cook. Note there are different fuel mixes for different altitudes and cold weather conditions but all gas type fuels work with the MSR, except for the large green Coleman propane canisters.
As cookware isn't included with the MSR stove, you'll need to buy a pot or two, a fork and a spoon, or for ultimate efficiency, a spork.
6. Water Filtration System
Hopefully your backpacking trip includes proximity to a stream, river or lake. What's better than camping next to a babbling brook, or casting into a cold clear lake to catch some dinner? Although the water may look pristine, it can be unsafe to drink from without purifying first.
Fortunately there's no need to take unnecessary risks by drinking questionable water. There are many ways to purify water, and each year new products come out promising to make the process faster and better using ever more compact filtration systems.
So if the old fashioned boiling or Iodine pill purification methods have you thirsting for something better, you'll have plenty of options to choose from. I personally use the Squeeze water filtration system by Sawyer. This system is easy to use, lightweight, requires no batteries, and is inexpensive.
7. Headlamp
You can use a regular flashlight on your first backpacking trip, but you'll be far better served investing in a quality headlamp. Using a headlamp keeps your hands free for cooking, reading a map, walking around the campsite or hiking after dark. And since the light source is on your forehead above your eyes, it shines wherever you look.
What's more, headlamps are lighter and more compact than a flashlight. Kilimanjaro Gear offers a nice basic headlamp with some cool features such as a spotlight or floodlight option and a red light mode for preserving night vision.
If you choose to go upscale or are planning a cold weather trip, I recommend the Black Diamond Icon Polar which has all the bells and whistles and is designed to work well in extreme cold.
In either case, I recommend purchasing rechargeable batteries to power your headlamp. And pro tip: always recharge your batteries as soon as you get home from your trip.
8. Appropriate Clothing
I could devote an entire blog post to clothing (and will soon). Meanwhile, here's the tip of the day: do not wear jeans or other cotton clothing.
"Cotton Kills". This bit of back-country wisdom says it all: cotton readily absorbs water and doesn't dry quickly - a potentially deadly combination that can cause or accelerate hypothermia. No Bueno!
Here are better choices for clothing:
- Polyester - durable, affordable, warm and breathable.
- Fleece - makes a great insulating layer as it retains warmth when wet, offers nice "loft", dries quickly and is fairly durable
- Nylon - good for outer layers, offering wind and water resistance without a lot of weight.
- Wool - durable and warm, offers insulation when damp, doesn't retain body odor as quickly and therefore is reusable multiple times on a trip
- Gore-Tex - a highly breathable, waterproof and pricey material that's great for outer layers, especially for high activity levels that generate sweat.
Proper footwear is as essential as the right clothes. You wouldn't believe how many people I come across hiking in snow wearing running shoes. At best their feet will become painfully numb, wet and cold; at worst they're risking frostbite.
Wool socks and waterproof hiking boots will eliminate this risk. You'll also reducing the chances of experiencing one of the most common and dreaded hiking injuries: a sprained ankle.
9. Food
Many first time backpackers make the mistake of bringing heavy food such as cans of soup or items packaged in glass or metal containers. This weight adds up quickly.
Instead, pick high-calorie foods that are also lightweight. Use the calorie-to-weight ratio (food weight not your body weight) when selecting foods.
When I want an easy meal that'll refuel my body, I buy the delicious Mountain House dehydrated meals. These meals contain 10-25 grams of protein and pack nearly 1000 calories of energy into a few ounces.
Other good options are powdered oatmeal, pancake mix, trail mix, almonds, peanut butter and jelly on a flour tortilla, and boxed mac and cheese.
10. Additional Needs
In addition to the above core items, here's a checklist of a few more things I consider must-haves:
First Aid Kit
A basic kit with moleskin patches will address the most common backpacking injuries, including blisters. Avoid blisters at all costs as they can slow or stop a backpacker in her tracks.
Map of Region and Compass
If you're going deep into the back country, you'll need a backup to your phone or GPS device. Batteries die, and you might too if you lose your way. Learn how to use a map and compass. You'll impress your friends (and maybe save their lives too).
Sunscreen and Sunglasses
Sunburn hurts and can accelerate dehydration. Sunglasses protect your eyes from UV rays and branches. Don't forget reading glasses if you use them.
Insect Repellent
Nothing is worse than swatting at mosquitos and no-see-ums all day. For particularly buggy spots, I'll use a head net. It packs small, weighs nothing and is easy to see and breathe through. Money!
Hat
You lose body heat through your head faster than anywhere else. So cold weather demands a beanie, while hot and sunny climes call for a sunhat.
Spare Batteries
For headlamp, GPS and/or phone.
Lighter/Waterproof Matches
Just in case.
I hope this list helps get you motivated to strap on a pack and get out there. I love the sights, sounds and serenity of the wilderness, and I know you will too.
See you out there on the trails!
Connor.
P.S. Share your own tips in the comments!
- Andy Somerville